Tuesday, March 2, 2010

Reflective Image for the Artist Network TV Lesson


Step 14 Finishing the reflective image helps anchor my whole still life, and gives the whole painting a finished look. Now to finish painting the flowers at the top of the painting.


Step 13
Painting the reflective image onto the table top, using muted colors and painting what I see is key in this step.

Wednesday, February 24, 2010

Chris Beck Studio

Check out the wonderful article written by Chris Beck.
http://brush-paper-water.blogspot.com/
It is an article featuring my art work, beautifully written by Chris Beck posted for all to see.

Tuesday, February 23, 2010

My lesson for Artist Network TV

STEP 12
At this stage I painted in my first glaze of yellow. I will continue this step by step lesson, this week as I finish this fabulous still life, with all of it's wonderful elements.


STEP 11
Now I will begin to pay attention to the painting the stem and the darkest values of the yellow vase, this is to set up the shapes for the next step which will be painting in the yellow glaze.


STEP 10
Distorted shapes are one of my favorite things to paint you can push and exaggerated the shape to your hearts content.


STEP 9
Now onto the tall yellow vase working at the base of this vase, it is clear thick glass that will show lots of distortion of the objects that are near it.


STEP 8
Here it is a transparent candlestick holder


STEP 7
Paint in the medium values - leaving the white of the paper to for the lighter values.


STEP 6
Now it is time to concentrate on the green beveled candlestick holder, painting the darkest values first, will create what I like to call the "structure" of the glass image.


STEP 5
Painting the base is as simple and changes your values to create a beautiful round edge.


STEP 4
Once the Cut Crystal is painted I now will begin painting the lower portion of the vase, simple vertical strokes developing the beveled edges.


STEP 3
Painting the cut crystal's is just one of the most exciting elements of this vase, I can see so much color and refracted shapes, which encourages me to paint with exaggeration and adding all the colors from the prism.


STEP 2
Now that all the shapes have been painted in I will now concentrate on the cut crystals surrounding the deep red diamond in this cut crystal vase.


STEP 1
I started the first step of my image painting all the darkest values of the diamond shapes.


REFERENCE PHOTO


In May I will be traveling to F&W Publishing to shoot two 60 minute instructional DVDs. They will be aired on ArtistnetworkTV.com. I am honored and am excited to be traveling to Ohio in May. I will be meeting all the fabulous people that work behind the scenes of our favorite instructional books and DVD's. Here is a small preview of my first step by step painting in which I will be painting in one of the two 60 minute DVDs.

Wednesday, October 21, 2009

Here is What Has Been Happening in My World...


The last few months have been very busy with demonstrations and workshops, I have had the privilege and pleasure of traveling and meeting so many talented watercolorists. Every workshop and demonstration is a learning experience for me, I pick up some fun new tips from my students, and see the beautiful results of all my students after each workshop. At the end of workshop it is always a bitter-sweet, saying good-bye to my new friends is a sad moment, coming home is always so nice.
Here are some photos of my past few weeks -

MORRO BAY ART ASSOCIATION
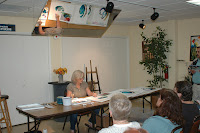
September 19, 2009 Demonstration for Morro Bay Art Association, Morro Bay California. They have a beautiful 2-story gallery along with an awesome workroom, an instructors dream for a workshop.
I will be teaching a 2- day workshop for this Association in March 2010, and am so looking forward to returning and getting to know this group of artists.

FILOLI 3-DAY WATERCOLOR WORKSHOP
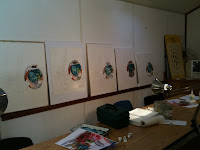
September 24-26 2009 - A three day workshop at Filoli Estates in Woodside, California.
Here are some of the students paintings on day 2 - believe me they worked very hard to get to this point, I so appreciated all their hard work. And such beautiful results for all!


ALBUQUERQUE, NEW MEXICO
5-DAY WORKSHOP WITH NEW MEXICO WATERCOLOR SOCIETY
Here is Guy Magallanes, all dressed up for my demonstration before the NMWS, doesn't he look great with his nifty vest?
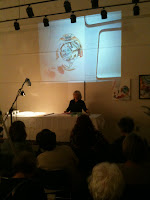
During my 5-day workshop I demonstrated before the group, they have this fabulous set-up with a camera that projects my image onto the wall so that all can see, even the oops moments were recorded!! What a great evening - just loved this group.
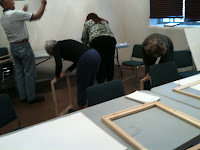
Here are my students stretching their watercolor paper onto stretchers bars, staples were flying on this project.
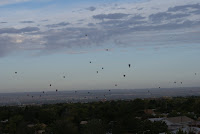
Outside my hotel window I would wake up each morning to see the balloon festival afloat. Just a beautiful sight.
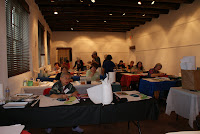
October 5-9, 2009, The workshop room, all my students getting ready for the beginning of what was to be a wonderful workshop. There is Lulu in the front row, she came all the way from Australia!
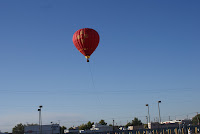
Here is a ballon trying to land in the parking lot of the Expo Fairgrounds, right next to our classroom.

ON TO PASADENA
LEARNING PRODUCTS EXPO
October 14, 2009 we drove to Pasadena CA, in the pouring rain for the Learning Products Expo. We were all given a beautiful classroom to set-up Guy and I shared a classroom.
Here is Guy trying to get our projector set up for the showing of Art 2 Art, yes we take our art very seriously...And below is the beautiful classroom we shared.
That is it for now -


Saturday, September 5, 2009

Untitled Varnished Watercolor

Finished!! This piece is 24" x 30" I must say I love this piece, not ready to put a price tag on it just yet. It will do a little traveling before it goes up for sale. First stop Pasadena Expo. Also a portion of this piece will be a lesson I am teaching in New Mexico, Filoli and Pasadena. Hope I will see some of you at one of these events.