Sunday, April 25, 2010

Painting Florals Dark to Light


Step Three
Finish the Iris with lovely glazes of purple and pink creating a beautiful iridescent hue of purples and pinks.
I painted this painting today, took me about 7 hours including a lunch break. I will be teaching this and a Magnolia Floral all on a 60 minute DVD for The Artist Network TV. Simple and fun approach to painting a beautiful floral, dark-medium, and last but not least light values!!!
Hopefully you will give this a try.


Step Two
Paint in the Medium Values leaving the white of the paper for lighter values.


Step One
Paint in all your dark values first, shadows and all!!


Finished Image

Here is the finished image for the my DVD lesson with Artist Network TV.
I will be leaving May 17th to shoot this DVD and another on florals dark to light.
More on the floral DVD...

Tuesday, March 2, 2010

Reflective Image for the Artist Network TV Lesson


Step 14 Finishing the reflective image helps anchor my whole still life, and gives the whole painting a finished look. Now to finish painting the flowers at the top of the painting.


Step 13
Painting the reflective image onto the table top, using muted colors and painting what I see is key in this step.

Wednesday, February 24, 2010

Chris Beck Studio

Check out the wonderful article written by Chris Beck.
http://brush-paper-water.blogspot.com/
It is an article featuring my art work, beautifully written by Chris Beck posted for all to see.

Tuesday, February 23, 2010

My lesson for Artist Network TV

STEP 12
At this stage I painted in my first glaze of yellow. I will continue this step by step lesson, this week as I finish this fabulous still life, with all of it's wonderful elements.


STEP 11
Now I will begin to pay attention to the painting the stem and the darkest values of the yellow vase, this is to set up the shapes for the next step which will be painting in the yellow glaze.


STEP 10
Distorted shapes are one of my favorite things to paint you can push and exaggerated the shape to your hearts content.


STEP 9
Now onto the tall yellow vase working at the base of this vase, it is clear thick glass that will show lots of distortion of the objects that are near it.


STEP 8
Here it is a transparent candlestick holder


STEP 7
Paint in the medium values - leaving the white of the paper to for the lighter values.


STEP 6
Now it is time to concentrate on the green beveled candlestick holder, painting the darkest values first, will create what I like to call the "structure" of the glass image.


STEP 5
Painting the base is as simple and changes your values to create a beautiful round edge.


STEP 4
Once the Cut Crystal is painted I now will begin painting the lower portion of the vase, simple vertical strokes developing the beveled edges.


STEP 3
Painting the cut crystal's is just one of the most exciting elements of this vase, I can see so much color and refracted shapes, which encourages me to paint with exaggeration and adding all the colors from the prism.


STEP 2
Now that all the shapes have been painted in I will now concentrate on the cut crystals surrounding the deep red diamond in this cut crystal vase.


STEP 1
I started the first step of my image painting all the darkest values of the diamond shapes.


REFERENCE PHOTO


In May I will be traveling to F&W Publishing to shoot two 60 minute instructional DVDs. They will be aired on ArtistnetworkTV.com. I am honored and am excited to be traveling to Ohio in May. I will be meeting all the fabulous people that work behind the scenes of our favorite instructional books and DVD's. Here is a small preview of my first step by step painting in which I will be painting in one of the two 60 minute DVDs.

Wednesday, October 21, 2009

Here is What Has Been Happening in My World...


The last few months have been very busy with demonstrations and workshops, I have had the privilege and pleasure of traveling and meeting so many talented watercolorists. Every workshop and demonstration is a learning experience for me, I pick up some fun new tips from my students, and see the beautiful results of all my students after each workshop. At the end of workshop it is always a bitter-sweet, saying good-bye to my new friends is a sad moment, coming home is always so nice.
Here are some photos of my past few weeks -

MORRO BAY ART ASSOCIATION
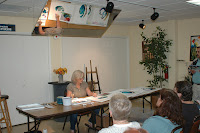
September 19, 2009 Demonstration for Morro Bay Art Association, Morro Bay California. They have a beautiful 2-story gallery along with an awesome workroom, an instructors dream for a workshop.
I will be teaching a 2- day workshop for this Association in March 2010, and am so looking forward to returning and getting to know this group of artists.

FILOLI 3-DAY WATERCOLOR WORKSHOP
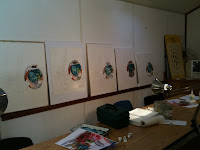
September 24-26 2009 - A three day workshop at Filoli Estates in Woodside, California.
Here are some of the students paintings on day 2 - believe me they worked very hard to get to this point, I so appreciated all their hard work. And such beautiful results for all!


ALBUQUERQUE, NEW MEXICO
5-DAY WORKSHOP WITH NEW MEXICO WATERCOLOR SOCIETY
Here is Guy Magallanes, all dressed up for my demonstration before the NMWS, doesn't he look great with his nifty vest?
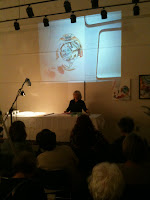
During my 5-day workshop I demonstrated before the group, they have this fabulous set-up with a camera that projects my image onto the wall so that all can see, even the oops moments were recorded!! What a great evening - just loved this group.
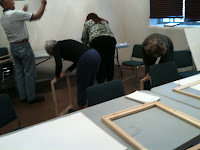
Here are my students stretching their watercolor paper onto stretchers bars, staples were flying on this project.
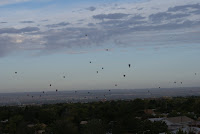
Outside my hotel window I would wake up each morning to see the balloon festival afloat. Just a beautiful sight.
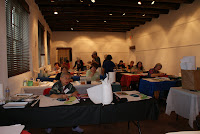
October 5-9, 2009, The workshop room, all my students getting ready for the beginning of what was to be a wonderful workshop. There is Lulu in the front row, she came all the way from Australia!
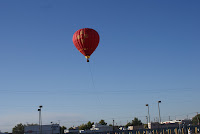
Here is a ballon trying to land in the parking lot of the Expo Fairgrounds, right next to our classroom.

ON TO PASADENA
LEARNING PRODUCTS EXPO
October 14, 2009 we drove to Pasadena CA, in the pouring rain for the Learning Products Expo. We were all given a beautiful classroom to set-up Guy and I shared a classroom.
Here is Guy trying to get our projector set up for the showing of Art 2 Art, yes we take our art very seriously...And below is the beautiful classroom we shared.
That is it for now -


Saturday, September 5, 2009

Untitled Varnished Watercolor

Finished!! This piece is 24" x 30" I must say I love this piece, not ready to put a price tag on it just yet. It will do a little traveling before it goes up for sale. First stop Pasadena Expo. Also a portion of this piece will be a lesson I am teaching in New Mexico, Filoli and Pasadena. Hope I will see some of you at one of these events.

Tuesday, August 18, 2009

Art 2 Art Filming

Three cameras, lots of lights one director, one tech assistant, hours of set-up, tons of make-up and lots laughs and the filming of Episode 4 for Art 2 Art is complete.
Look at all the palettes! What were we thinking?
Here we are before our the filming, getting our microphones hooked up. It was amazing seeing Gallery 2611 transformed into a studio for filming.


Here we are at the end of filming "Art 2 Art", Guy and I had a little paint fight at the end. Check out the paint on the shirt.

Tuesday, August 4, 2009

Norris Canyon Workshop

On day three, Guy Magallanes came along with me to visit the ranch and to take photos. No such thing as a free ride, buddy. I asked Guy to paint the sky, using the Guy method! What a treat getting two perspectives in one workshop. The students got a little insight of the Asilomar Workshop, April 2010.
Thanks Guy it was so fun having you teach too, looks like we both will be signing the painting. For more photos of the ranch and Guy's adventures check out his blog at guymagallanes.blogspot.com
My fabulous students are working hard. Learning how to paint the crinkles of the Icelandic Poppies' pedals.
Day three we were finishing up the painting, here I am demonstrating how to paint the white poppy. Yes I know, can't paint without the tongue sticking out.
Here we are painting the Icelandic Poppy, dark to light learning the Joyce method.
Last weekend I taught a three day workshop in Castro Valley, coordinated by Cynthia, Donna and Michelle from the Pleasanton Art Group. Cynthia and her partner Susan and their son Vincent, were so sweet to open their home to the group. The photo above is the beautiful setting of the backyard of their ranch, which is 56 acres of breath taking rolling hills for our back drop. Along with this wonderful setting, we were accompanied by a rooster named "Sunny" crowing and strutting, along with the many beautiful, hens. On day 2 of the workshops two baby chicks were born. Congratulations to the mother hen and Sunny.
We also had Jessie James, the Jack Russell, so sweet and friendly, taking turns to sit on our laps, as well as Sabastian the cat was also in competition for our attention, owning the his space, both pets making us feel right at home. I could not stop smiling throughout the workshop, love being in the country.
Just want to acknowledge Cynthia, Susan and Vincent for the use of the home and letting us come and be a part of their family for the past three days, this workshop will be one of the most memorable, thank you.

Monday, July 27, 2009

Work in Progress

Here is my latest painting, it is watercolor, size 30"w x 24" h. I have a little bit of time in between workshops, I am hoping to finish this before the end of this week. This still life has my favorite piece of glass in it, the big piece in the middle was purchased in Murano, Italy. Just a little more to go, I will post the final photo once it is finished.

Monday, July 13, 2009

Chicago Learning Products Expo Workshop

Here is the North Light booth again, during our lunch hour Laurie and I would attend the booth and sign a few books. For more information on the Pasadena Expo, check out their website at www.learningproductexpo.com. If you can attend this event it is so well worth the time to come meet the instructors take a 3 or 6 hour workshop and shop for fabulous bargains and the vendors booth.
Here is a close-up of the poster for North Light's booth, I got the opportunity to meet Laurie Humble. It was wonderful meeting another artist, Laurie humble that has an interest in painting the same subject of realism and Laurie has a wit that made me laugh throughout the 3-days of teaching. Thank you Laurie it was great having our classrooms so close, I look forward to seeing you in Pasadena
Here is my classroom set-up and ready for the next three crazy fun days to follow. My day started at 9:00 and ended at 4:00. We had 45 minutes to grab a bite for lunch and then directly back to painting.
Here are a few photos from The Chicago Learning Products Expo - North Light's booth this is just prior to the doors opening for the visitors to the Expo. Unfortunately all of my photos are at the beginning of the expo, once classes started it was on, and I forgot to take the time to pull out the camera. thank you to all the wonderful artists I had in my workshops, you all are truly great taking the time to trust my method and apply it to your own paintings, you all are just the best, I am still smiling thinking of the past few days.

Tuesday, June 30, 2009

SOLD!!!

I sold "Facets & Fractures" 45"x20" varnish watercolor painting yesterday, unfortunately not in the fashion I am use to, allow me to explain...
I took 4 paintings in to be framed, my local frame shop has closed and so I decided to give Aaron Brothers a try. Received a call, voicemail, from the framer at Aaron Bros. that 3 of the 4 paintings were ready, but so sorry to say while framing one of the paintings, a screw had dropped onto the canvas portion and had poked a hole into the painting.
My heart sunk, they did not mention which piece, I thought hope it's not "Facets & Fractures". I got there and sure enough it was this painting, the framing had been complete, and it look awesome, but the painting was not repairable. The framer felt awful about it, she had cried. I gave her a hug and told not to worry. The hole was the size of a screw, up in the left hand corner. It was so sad, Aaron Brothers agreed to purchase the piece. My next questioned was will they destroy it or will the company hang it? The framer said it may be shipped to the company headquarters, to hang. So I agreed to let them buy it feeling that at least it would hang somewhere. As I repeated this story to my husband, last evening, I got the sinking feeling that it was the same type of story you tell a kid when the family dog is missing, "the dog is on a big farm where he has lots of room to run". This piece will more than likely be destroyed which is so sad to me, but the decision was either make a sale or keep damaged goods. So I opted for the sale, with hopes to re-paint this still life in the future.

Sunday, June 28, 2009

Riley Street Art Supply Vendor's Fair

On Saturday I gave a demonstration and had a book signing at the Riley Street Art Supply Vendor's Fair in Santa Rosa CA. What a fun event, the group that came to see me demonstrate was such a fun group. Thank you all for attending! And a big thank you to Riley Street, all of you worked so hard, making sure everyone was happy and keeping us all very cool, it was about
100 degrees outside, and air conditioned inside. I will return to Santa Rosa to the Riley Street Art Supply store to teach a 2-day workshop Aug 29-30th. And a huge thanks to my friend and watercolor partner Guy Magallanes, he came along and was a huge trooper through out the heat of the day. Guy demonstrated his work and spoke with prospective students for our Asilomar workshop. Thanks Guy, you made the day fun.

Thursday, June 25, 2009


STEP SEVEN
The final glazes have now been added. The painting is finished. Remember to paint with joy and happiness and success will follow!!

STEP SIX
Paint in the middles values, this will get this will get this vase ready for the final glaze of light values.
STEP FIVE
Here the vase with glazes of gray, blue and yellow, all the strange dark shapes now will come together and the vase gets the depth and volume, as well as transparency.

STEP FOUR
To begin the Murano vase, paint all the darkest shapes first. As I was painting this I thought ee-gads get the shapes right, this only made my brush strokes become jagged and stiff.
I tell my students "don't take the shapes literally, best to paint with joy and ease, this will come through in your painting". So after taking myself too seriously, I thought "hey practice what you preach, have fun and let the brush do the work."